Provide a small educational human skeleton for students to observe throughout the teaching of the unit.
Activity One: Introduce the unit with mentor texts
Part One
Materials: The Skeleton Inside You, t-chart on chart paper with question, chart to track content from text (examples below), student science journals
To introduce the unit on the understanding of our skeletal system, students will learn about the need for a healthy skeleton to support and protect our bodies’ various systems. Students will listen to The Skeleton Inside You by Philip Balestrino and begin to collect some facts. This text highlights the way that water is affected and needs to be treated.
Begin by asking some questions to activate background knowledge: Have you ever seen a skeleton? What kinds of things did you notice? What kinds of problems do people have with their bones? Have you ever seen ways that people are helped with their bones?
Ask students the question posted on the chart, “How does our skeleton help us?” Record any answers and ideas on the left side titled “What We Know.” Read aloud The Skeleton Inside Us.
Prepare T-Chart
| How does our skeleton help us? |
|
| What We Know |
What We Have Learned |
|
|
Prepare text content chart
| The Skeleton Inside You |
|
|
| Bones we have |
What bones do |
Ways to help our bones |
|
|
|
On the 2nd chart, track the learning that occurs during the reading in the first two columns with the third column for recording any thoughts and ideas the students might generate as they think about the text.
Return to the t-chart of responses and on the right-side section titled “What We Have Learned.” In their science journals, students should transfer the information from each completed chart.
Part Two
A second introductory resource is the picture book, Bones by Stephen Krensky. This book will help students learn the structure of our skeleton and help them recognize that bones, in fact, can have problems.
Questions to ask before reading:
Why do we need our skeleton?
What would happen if your skeleton didn’t work in some way?
Questions to ask after reading:
How do you think the bones are helpful?
What happens if part of the skeleton isn’t working?
How do you think we can fix any problems with our bodies?
What do you think we can do to fix parts inside our bodies?
Compare your size with your parents’ size? What are the differences?
Does our skeleton need you to help it every day? How?
What could we do as engineers to help people with skeletal problems?
What sorts of devices have you noticed that help people move around?
At the end of the book, use the skeleton model to reinforce the learning. Students will refer to the model for a number of activities throughout the unit so returning to it and making it available for inquiry will enhance the students’ understanding.
From these two resources, my students will develop fundamental vocabulary and conceptual understanding to begin the hands-on work that will come later in the unit.
Activity Two: Skeletal & Engineering Terms
Students will be using a new set of vocabulary to discuss the concepts within this unit and it is important to have this available through anchor charts. Prepare two charts (or word walls) to ensure the students will have access to these Tier 3 words they discover throughout the unit. This will be an ongoing, interactive process.
Engineering, design process, observation, problem, solution, improve, data, materials, create, form, shape, model, analysis, investigate, control, diagram, patterns, predict, reflect, evidence,
Bones, skeleton, skull, ribs, pelvis, vertebrae, tibia, fibula, femur, radius, ulna, …
Students will mold, paint & display a human skeleton
Die cast supplies: casting material, paints, tray, glue, crayons & paint brush
Smithsonian Museum Craft Kits (purchased) will be used in small groups to create the human skeleton. The kit comes with directions that each group will follow, with adult support. After completing the project, students will record the experience through drawing and labeling their model.
Activity Four: Viewing X-rays
Light table, variety of x-rays
Students will have an opportunity to use the light table to explore and discover what images of our bones look like. Students, in small groups, will identify bones and place them on the light table to make a person. Some images show bones that have fractures and students will learn to identify the location of the fractures.
Activity Five: Creating a Skeletal X-ray
Several varieties of pasta, black construction paper, glue
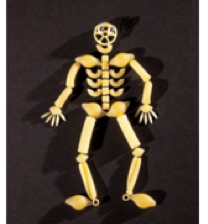
Students will create a “skeleton” with pasta as a fun example of a human skeleton. Use this activity to support students’ skill of following directions. Each bone is represented by a corresponding pasta shape.
Activity Six: Visit Peabody Museum
We are fortunate to have the Peabody Museum of Natural History available to our students for field trips. We will take a field trip to look at and draw skeletons (of dinosaurs) in the Great Hall. Students will make connections to the understanding they have of the human skeleton and share their experience through their journals and through “sharing” with their peers in the classroom.
Additional Activities: Enrichment level options
Bone Puzzle
Though it’s much easier to remember the names of bones when looking at a skeleton, students should be able to identify bones in isolation by their shapes as well. In order to help young children understand how the skeleton works, not just as a system but as the sum of individual parts, ask them to build a person out of bones. After the students learn the proper names of the major bones, blow up a picture of a skeleton until it is approximately life-size. Carefully cut out each individual bone so you have a pile of paper bones. Divide the pile and your students into groups and ask the students to work together to tape the bones together in their appropriate places to build a skeleton.
Bones from the Inside Out
One of the most important lessons a child can learn about the skeleton is how a bone is made. Using sponges and paper towel tubes, explain to students that bones have marrow at their core, a substance that is spongy and lighter than the outer material of the bone, which is represented by the paper towel tube. Fit the sponge inside the paper towel tube to show how marrow makes a bone strong by comparing it to the empty paper towel tube. Compare human bones to bird bones, which have no marrow. A bird’s light, hollow bones let them fly, but make their bodies much more fragile than a human being’s bones. Identifying the difference between human and bird bones through weight and strength helps students understand the importance of marrow in the skeletal system.
Calcium in the Skeletal System
During the reading and conceptual understanding that takes place during this unit, the students learn that milk is good for their bones. This activity helps demonstrate how calcium makes a bone strong. Before class, boil and dry chicken bones. Have the students to describe how they feel -- they should mention that the bone feels strong. As a class, put half of the chicken bones in a jar of vinegar, explaining that vinegar dissolves calcium. At the end of the week, compare the group of bones that were in the jar of vinegar to the bones that were not. The vinegar bones will feel stretchy as the calcium that made the bone tissue strong has disappeared.
Fun Bone Song
Begin by writing the lyrics below (sung to the tune of “When You´re Happy and You Know It, Clap Your Hands”) on a large sheet of chart paper and display so that all the children in your class can see it. Then as children sing, have them point to each body part mentioned in the song.
"I'm Full of Bones"
From my fingers to my toes, I´m full of bones.From my fingers to my toes, I´m full of bones.If you count them all as one, they make a skeleton.From my fingers to my toes, I´m full of bones.
My smallest bone is found inside my ear.My smallest bone is found inside my ear.The stirrup helps me hear many sounds both far and near.My smallest bone is found inside my ear.
My longest bone is found inside my leg.My longest bone is found inside my leg.My femur´s really great ´cause it helps me stand up straight.My longest bone is found inside my leg.
My joints help my bones to move around.My joints help my bones to move around.My hips, elbows, and knees: Oh, it´s all so plain to seethat my joints help my bones to move around.
—Original song lyrics by Jennifer Prescott
Build A Bone
To help children understand what the inside of a bone looks like, have them each to make these simple bone models. Have students shape a 2" square of corrugated paper into a tube and tape the ends together. This tube represents compact bone, the hard outer layer that contains blood vessels and nerves. They then roll a 2" square of rubber shelf liner into a scroll and insert it into the bone tube. This represents spongy bone, a bone's lightweight inner layer. Finally, students fill the center of their models with red and yellow pompoms. Explain that the red marrow produces essential red and white blood cells for the body and that yellow marrow stores fat.
Long and Strong
Our arms and legs are each made up of three long bones: one in the upper part of each limb and two in the lower part. Invite pairs of students to measure and record the length of these bones to the nearest inch. First, have them measure the humerus from the shoulder to the elbow, the ulna from the elbow to the wrist, and the radius from the inside of the elbow to the thumb side of the wrist. Then ask children to measure the femur from the hip to the knee, the tibia from the knee to the inside ankle, and the fibula from the knee to the outside ankle. Which bone is the longest? (It is the femur.) This bone is also the strongest bone in the body. Can children explain why? Ask students to explain why the other bones in their legs and arms also need to be strong.
Bendable Backbone
The backbone is actually made up of many bones, called vertebrae, that link together and form sliding joints. To show how this construction allows for flexible movements such as twisting and bending, give children a fat plastic straw to cut in half. Have them cut snips along the length of one of the halves, being sure to leave the straw in one piece. When finished, ask students to bend and twist each straw half. Which straw half can be bent and twisted with more ease and flexibility?